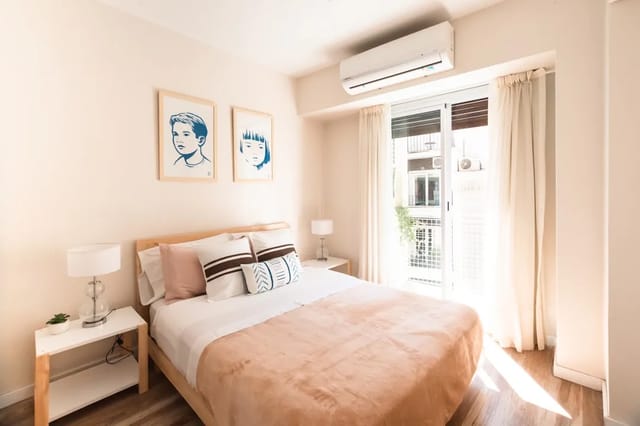
How to Use an Air Quality Monitor with Your HEPA Purifier
Pair your air quality monitor with a HEPA purifier for smarter, data-driven air cleaning. Optimal placement, setup steps, and how to read the numbers.

Table of Contents
- Why the Combination Matters
- Without a Monitor
- With a Monitor
- Setup: Getting the Most From Both Devices
- Step 1: Place the Monitor Correctly
- Step 2: Baseline Your Room
- Step 3: Turn On the Purifier and Observe
- Five Scenarios Where the Monitor Changes Everything
- 1. Cooking Smoke Recovery
- 2. Overnight Bedroom Air
- 3. Wildfire Season
- 4. Filter Replacement Timing
- 5. Right-Sizing Your Purifier
- Recommended Monitor-Purifier Pairings
- Bedroom (150-250 sq ft)
- Living Room (250-400 sq ft)
- Home Office (100-200 sq ft)
- Automate It: Let the Monitor Trigger the Purifier
- Approach A: A Native Smart Purifier with Auto Mode
- Approach B: A "Dumb" Purifier on a Smart Plug
- Trigger Thresholds: When Should the Fan Ramp Up?
- Troubleshooting Your Monitor-Purifier Setup
- The Monitor Reads Suspiciously Clean
- Readings Drift Over Time (Calibration)
- The Fan Cycles On and Off Constantly
- Common Mistakes to Avoid
- The Bottom Line
TL;DR
Place your air quality monitor on the opposite side of the room from your purifier, at breathing height. The monitor shows you real PM2.5 and CO2 data so you can run the purifier only when needed, verify it is working, and spot when ventilation is the real fix. This approach saves filter life, reduces energy use, and gives you better air than running a purifier blindly on auto mode.
Full Comparison
| # | Product | Best For | Rating | Price | |
|---|---|---|---|---|---|
| 1 | Aranet4 HOME Top Pick Aranet | Best CO2 Monitor to Pair with Purifier | 4.9 | $$ | Check Price |
| 2 | Airthings View Plus Airthings | Best All-in-One Monitor | 4.8 | $$$ | Check Price |
| 3 | Levoit Core 400S Levoit | Best Purifier with Built-in PM2.5 | 4.7 | $$ | Check Price |
Running an air purifier without a monitor is like driving without a speedometer. You know you are moving, but you have no idea how fast, whether you are improving, or when to change course. If you are new to monitor displays, start with our guide on how to read an air quality monitor.
Pairing an air quality monitor with your HEPA purifier transforms both devices. The purifier cleans the air. The monitor proves it, and reveals the problems your purifier cannot solve. This guide shows you exactly how to set up and use the combination.
Why the Combination Matters
Without a Monitor
You set your purifier to auto mode and hope for the best. You do not know:
- Whether the auto mode is actually responding to real pollution
- How long it takes to clean the room after cooking
- Whether your filter needs replacing (performance degrades gradually)
- Whether high CO2 is the real problem, not particles
With a Monitor
You see real numbers and make better decisions:
- PM2.5 drops from 25 to 2 µg/m³ after running on high for 30 minutes; the purifier is working
- CO2 hits 1,200 ppm despite the purifier running; you need to open a window, not buy a bigger purifier
- PM2.5 takes twice as long to clear as it did 6 months ago; time to replace the filter
- PM2.5 is already at 3 µg/m³, so save the filter and run on low or turn it off
Setup: Getting the Most From Both Devices
Step 1: Place the Monitor Correctly
Where: On the opposite side of the room from the purifier, at breathing height (3-5 feet off the floor). On a shelf, nightstand, or wall mount, not on the floor and not right next to the purifier.
Why: You want to measure the air you are breathing, not the clean air blowing directly out of the purifier. If the monitor is next to the purifier outlet, readings will be artificially low and you will miss pollution events happening across the room.
Distance: At least 6-8 feet from the purifier is ideal. In a bedroom, the purifier might be by the door and the monitor on the nightstand.
Step 2: Baseline Your Room
Before changing anything, run your monitor for 24-48 hours with the purifier off. This establishes your baseline:
- Morning PM2.5 with windows closed
- PM2.5 after cooking (this will spike)
- CO2 pattern through the day (watch it climb when the room is occupied)
- Overnight CO2 in the bedroom
Write these down or screenshot the history graph. This is your "before" data.
Step 3: Turn On the Purifier and Observe
Now turn on the purifier and watch the monitor. You should see:
- PM2.5 dropping within 15-20 minutes
- Near-zero PM2.5 (1-3 µg/m³) within 30-60 minutes in a closed room
- CO2 unchanged: this confirms the purifier filters particles but not gases
If PM2.5 is not dropping, check: Is the purifier sized for the room? Is the filter installed correctly? Is a window open introducing new particles faster than the purifier can remove them?
Five Scenarios Where the Monitor Changes Everything
1. Cooking Smoke Recovery
Without monitor: You run the purifier on high after cooking and turn it down when you stop smelling smoke, maybe 30 minutes.
With monitor: You see PM2.5 spike to 100+ µg/m³ when you start cooking. The purifier brings it down to 15 µg/m³ in 20 minutes and to 3 µg/m³ in 40 minutes. You know exactly when the air is actually clean, not just when it smells clean.
2. Overnight Bedroom Air
Without monitor: You run the purifier all night on auto mode. You wake up feeling groggy.
With monitor: PM2.5 is 2 µg/m³ all night; the purifier is doing its job. But CO2 is 1,800 ppm by 6 AM. The grogginess is not from particles; it is from stale air. Crack a window or leave the bedroom door open.
3. Wildfire Season
Without monitor: You close windows and run the purifier. You hope it is enough.
With monitor: You see indoor PM2.5 climbing despite the purifier because smoke is infiltrating through gaps. You find and seal the leaks. PM2.5 stays under 10 µg/m³, and now you know you are protected. See our best PM2.5 monitors for wildfire smoke for more on this scenario.
4. Filter Replacement Timing
Without monitor: You replace the filter on the manufacturer's schedule, every 6-12 months regardless of actual usage.
With monitor: You notice that recovery time after cooking has increased from 25 minutes to 45 minutes over 8 months. The filter is degrading. You replace it based on actual performance, not calendar date. Conversely, if you live in clean air, the filter may last longer than the schedule suggests.
5. Right-Sizing Your Purifier
Without monitor: You bought a purifier rated for your room size. Seems like it should work.
With monitor: PM2.5 takes 90 minutes to clear after opening the door, way too slow. The CADR is marginal for your room. You either need a bigger unit or need to place the current one more strategically. The monitor gives you the data to make the right call. Check our best air purifier for large rooms if you need to upgrade.
Recommended Monitor-Purifier Pairings
Bedroom (150-250 sq ft)
- Monitor: Aranet4 HOME ($200): silent, battery-powered, tracks CO2 which matters most overnight
- Purifier: Levoit Core 300S ($100): quiet on low, covers the room, WiFi control
Living Room (250-400 sq ft)
- Monitor: Airthings View Plus ($300): tracks PM2.5, CO2, VOCs, humidity
- Purifier: Coway Airmega AP-1512HH ($170): proven performer, auto mode works well
Home Office (100-200 sq ft)
- Monitor: Qingping Air Monitor Gen 2 ($120): CO2 + PM2.5 on one screen
- Purifier: Levoit Core 200S ($60): compact, quiet, WiFi enabled
Automate It: Let the Monitor Trigger the Purifier
Reading numbers and adjusting the fan by hand works, but you will not be watching the monitor at 2 AM or while you are at work. The next step is automation: let a rising PM2.5 reading turn the purifier up on its own. There are two ways to do this depending on the hardware you own.
Approach A: A Native Smart Purifier with Auto Mode
The simplest path is a purifier with a built-in laser particle sensor and a genuine auto mode, such as the Levoit Core 400S or a Coway Airmega. These units read their own intake air and ramp the fan up when particles rise, no external monitor or hub required.
The catch is what we flagged earlier: a purifier's onboard sensor reads air right at the intake, which is not always the air you breathe across the room. We recommend keeping a standalone monitor at breathing height as your reference. If your standalone monitor consistently reads higher than the purifier's own display during a pollution event, nudge the auto-mode sensitivity up a level (many apps expose a low/medium/high sensitivity setting) or set a manual fan floor. For a shortlist of units with reliable onboard sensors and app control, see our best smart air purifiers roundup.
Approach B: A "Dumb" Purifier on a Smart Plug
If you already own a good purifier without WiFi, you do not have to replace it. Put it on a Wi-Fi smart plug and let a monitor that exposes PM2.5 to a smart-home platform drive the plug. The building blocks:
- A monitor that publishes PM2.5 to a platform (for example, an Airthings or Qingping device that surfaces data to Home Assistant, IFTTT, or SmartThings).
- A smart plug rated for your purifier's wattage (most HEPA units draw 30-60W on high, so any standard 10A plug is fine).
- A routine or automation that reads the PM2.5 value and switches the plug.
Set the purifier's physical dial to your target fan speed, then let the plug decide when it gets power. A basic Home Assistant automation reads "when PM2.5 above 35, turn plug on; when PM2.5 below 12 for 10 minutes, turn plug off." IFTTT and SmartThings follow the same if-this-then-that logic with a threshold trigger.
Two practical notes. Cutting power mid-cycle is fine for simple HEPA purifiers, but ionizer or UV models may need a proper power-down, so check your manual before hard-switching the plug. And build in a delay (we use 10 minutes) before switching off so the fan does not cycle on and off every time PM2.5 wobbles across the threshold.
Trigger Thresholds: When Should the Fan Ramp Up?
Whichever approach you use, you need threshold numbers. We align ours to the US EPA PM2.5 AQI breakpoints so the automation matches the same categories your weather app reports. Use this as your starting reference and tune from there:
| PM2.5 (µg/m³) | AQI Category | Recommended Fan Action |
|---|---|---|
| 0-12 | Good | Auto or low (or off if you are saving filter life) |
| 12.1-35.4 | Moderate | Medium |
| 35.5-55.4 | Unhealthy for Sensitive Groups | High |
| 55.5-150.4 | Unhealthy | Max |
| 150.5+ | Very Unhealthy or worse | Max, and seal the room and check infiltration |
These are 24-hour PM2.5 AQI breakpoints from the US EPA, applied here as instantaneous fan triggers for convenience. If anyone in your home has asthma or allergies, shift each action up a notch: ramp to medium at 10 µg/m³ and to high at 25 µg/m³. For a monitor that reports these values accurately enough to automate against, see our best indoor air quality monitors.
Troubleshooting Your Monitor-Purifier Setup
The Monitor Reads Suspiciously Clean
If your monitor sits in the purifier's clean-air exhaust stream, it samples filtered air and reports numbers that are lower than the room actually is. Your automation then thinks the job is done while the far corner is still hazy. Move the monitor to the opposite side of the room at breathing height, at least 6-8 feet from the outlet, and re-check during a known pollution event like cooking. If the reading jumps once you move it, exhaust interference was the culprit.
Readings Drift Over Time (Calibration)
Low-cost laser particle sensors can drift after months of use, and CO2 sensors in particular can read high if they never see fresh outdoor air. Most quality monitors self-calibrate CO2 using an automatic baseline routine that assumes the sensor periodically sees roughly 400-420 ppm outdoor air, so open a window or take the unit outside for 15-20 minutes every few weeks to give it a clean reference. If your PM2.5 baseline in a known-clean room creeps up over time, wipe dust from the sensor intake and confirm firmware is current before trusting the automation.
The Fan Cycles On and Off Constantly
This is threshold chatter: PM2.5 hovers right at your trigger value and the plug flips repeatedly. Add hysteresis by using two thresholds instead of one, for example turn on at 35 and only turn off below 12, and add a minimum on-time of 10-15 minutes. Both native auto modes and smart-plug routines behave better with this buffer built in.
Common Mistakes to Avoid
Placing monitor next to the purifier. You will get artificially good readings and miss real problems.
Ignoring CO2. If you only watch PM2.5, you will miss the ventilation problems that cause drowsiness and poor concentration.
Running the purifier on high 24/7. This wastes filter life and energy. Use monitor data to run on low normally and ramp up only when needed.
Trusting the purifier's built-in sensor over the standalone monitor. The standalone monitor at breathing height is more representative of your actual air quality.
Sealing the room too tight. Great for PM2.5 but terrible for CO2. Balance filtration with ventilation.
The Bottom Line
A monitor makes your purifier smarter. It confirms the purifier is working, reveals when ventilation is the real answer, and helps you time filter replacements based on data instead of guesswork. The total investment for both (a good monitor and a good purifier) is $250-500, and the combination is worth significantly more than either device alone.
Related reading:
- Air Quality Monitor vs Air Purifier: when you need each device
- Best Indoor Air Quality Monitors: our top monitor picks
- How to Choose an Air Purifier: complete buyer's guide
- How to Test Air Quality at Home: full testing walkthrough
Frequently Asked Questions
Where should I place the monitor relative to the purifier?
My purifier says air quality is good but my monitor says it is bad. Which is right?
Should I leave my purifier on all the time or use monitor data to turn it on and off?
My PM2.5 drops but my CO2 keeps rising. What is happening?
How fast should my purifier bring PM2.5 down?
You Might Also Like
Best Formaldehyde Monitor for Home (2026)
The best formaldehyde monitors of 2026 for new furniture and renovations. We explain HCHO sensors vs. tVOC, and rank monitors by accuracy and value.
Best VOC Monitor for Home (2026)
The best VOC monitors of 2026 for home air quality tracking. We rank monitors by tVOC sensor quality, parameters covered, smart home integration, and value.
Air Quality Monitor vs Air Purifier: What You Actually Need
Air quality monitors and air purifiers solve different problems. We explain which you need first, when you need both, and how to use them together effectively.
Best Radon Detectors for Home (2026)
The best radon detectors for home use in 2026. Continuous monitors with accurate, real-time readings so you can act before radon becomes a health risk.