Where to Place Your Air Quality Monitor for Accurate Readings
Learn exactly where to place your air quality monitor in every room. Avoid common mistakes that cause false readings and get data you can trust.
Table of Contents
- The Golden Rules of Monitor Placement
- Room-by-Room Placement Guide
- Bedroom
- Living Room
- Home Office
- Kitchen
- Nursery or Child's Room
- Basement
- Common Placement Mistakes
- Mistake 1: Next to the Air Purifier
- Mistake 2: On the Windowsill
- Mistake 3: In Direct Sunlight
- Mistake 4: Behind Furniture
- Mistake 5: In the Kitchen as Your Only Monitor
- Multi-Room Monitoring Strategy
- Special Placement Scenarios
- If You Have Pets
- If You Live Near a Highway or Industrial Area
- If You Have Attached Garage
- If You Run a Humidifier
- How to Verify Your Placement Is Good
- Bottom Line
TL;DR
Place your air quality monitor at breathing height (3 to 5 feet), away from windows, vents, and heat sources, and on the opposite side of the room from your purifier. Avoid kitchens for baseline readings. For multi-room monitoring, start with your bedroom and main living area. Bad placement is the number one reason people get readings that do not match how they feel.
Bad placement is the most common reason people get air quality readings that do not match reality. You spend hundreds on a monitor, set it up in the wrong spot, and end up making decisions based on data that does not reflect the air you are actually breathing.
This guide covers exactly where to place your monitor in every room, what to avoid, and how to set up multi-room monitoring if you want the full picture.
The Golden Rules of Monitor Placement
Before we get into room-by-room recommendations, three rules apply everywhere.
Rule 1: Breathing height. Place your monitor between 3 and 5 feet off the ground. This is where your nose and mouth are when sitting or standing. Floor placement picks up settled dust and gives inflated particle readings. Ceiling height misses the pollutants that matter most.
Rule 2: Away from interference. Keep the monitor at least 3 feet from windows, HVAC vents, space heaters, humidifiers, and cooking surfaces. These create microclimates that do not represent your room's actual air quality.
Rule 3: Open air circulation. Do not tuck your monitor inside a bookshelf, behind furniture, or in a corner where air stagnates. The sensor needs free airflow to sample representative air. A shelf edge or side table works well.
Room-by-Room Placement Guide
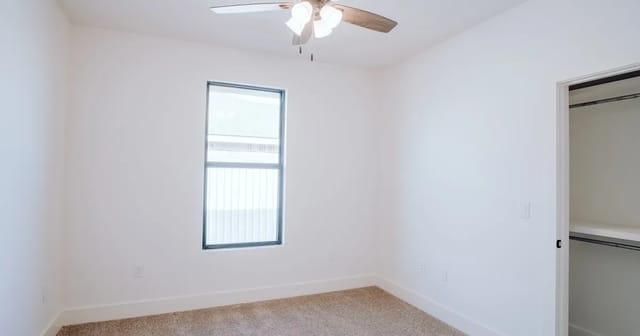
Bedroom
The bedroom is the single most important room to monitor. You spend roughly a third of your life here, and CO2 levels climb through the night in closed rooms, directly affecting sleep quality.
Best placement: On a nightstand or dresser, 3 to 5 feet high, at least 3 feet from the bed. Placing a monitor directly on your nightstand right next to your pillow can pick up your exhaled CO2, giving artificially high readings.
Avoid: Directly next to the bed (exhaled CO2 spikes), on the windowsill (temperature and draft interference), or on the floor under the bed (dust accumulation).
If you run an air purifier in the bedroom, place the monitor on the opposite side of the room from the purifier. This is the approach we recommend in our guide on using monitors with purifiers.
Living Room
The living room presents a challenge because it is usually the largest and most variable space in the home. Foot traffic, cooking odors drifting from the kitchen, and frequent door openings create fluctuating readings.
Best placement: On a side table or shelf along an interior wall, away from exterior doors and windows. If you have an open floor plan that connects to the kitchen, place the monitor on the far side from the kitchen to avoid cooking spikes dominating your data.
Avoid: On top of the TV (heat rises from electronics), near the front door (drafts and outdoor air), or on the fireplace mantle (residual heat and combustion particles).
Home Office
If you work from home, your office is the second-highest priority room after the bedroom. CO2 buildup in a small, closed office directly impacts focus and cognitive performance. Studies show that CO2 levels above 1,000 ppm can reduce decision-making performance by 11 to 23 percent.
Best placement: On your desk or a nearby shelf, at seated breathing height (about 3.5 feet). Position it at least 2 feet away from your computer to avoid heat interference from your machine's exhaust.
Avoid: Directly behind your monitor (heat pocket), on a window ledge (sunlight and drafts), or on the floor under the desk (dust and poor circulation).
Kitchen
Kitchens produce the most dramatic air quality events in any home. Cooking on a gas stove can spike PM2.5 to 200+ µg/m³ in minutes, and VOC levels surge from oils, spices, and cleaning products.
Best placement: If you want to track cooking pollution, mount the monitor 5 to 8 feet from the stove, at breathing height, away from the range hood exhaust. This gives you a useful picture of cooking emissions without being overwhelmed by the direct plume.
Avoid: Directly above or next to the stove (extreme heat and smoke), near the sink (humidity spikes), or right at the range hood vent (the hood creates a strong draft that skews readings).
Important note: Kitchen monitors are valuable as secondary devices, but a kitchen reading should never be your baseline for home air quality. The swings are too large and too frequent.
Nursery or Child's Room
For families with young children, nursery air quality deserves its own monitor. Babies and toddlers breathe faster than adults and are more susceptible to particulate matter.
Best placement: On a dresser or wall-mounted shelf at crib height (about 3 feet). Position it on the same side of the room as the crib but not directly on or touching the crib. You want to measure the air near where the baby sleeps without picking up direct exhalation.
Avoid: On the floor (dust and VOCs from flooring), on the changing table (product fumes during diaper changes), or next to a humidifier (humidity sensor saturation).
Basement
Basements are the most important room for radon monitoring and tend to have the highest humidity and mold risk in any home.
Best placement: On a shelf or table in the area where you spend the most time (home gym, rec room, laundry area), at breathing height. For radon specifically, the EPA recommends placing the detector in the lowest livable level, away from exterior walls and sump pits.
Avoid: Near the sump pump (humidity spikes), against exterior walls below grade (cold surface condensation), or in utility closets (unrepresentative air).
Common Placement Mistakes
These are the errors we see most often, and each one can make your readings unreliable.
Mistake 1: Next to the Air Purifier
If you place the monitor right next to your purifier's clean air outlet, you will see beautiful, low numbers that do not match the rest of the room. The purifier creates a bubble of clean air around itself. Your monitor should measure the room's air, not the purifier's exhaust.
Mistake 2: On the Windowsill
Windows seem logical because they are visible and accessible. But windows introduce direct sunlight (throws off temperature readings), drafts (rapidly changing particle counts), and temperature differentials that make every metric less reliable.
Mistake 3: In Direct Sunlight
Sunlight heats the monitor's housing, which raises the internal temperature sensor reading. Some laser-based particle sensors also become less accurate when the housing heats up, because warmer air holds less moisture and changes particle behavior inside the sensing chamber.
Mistake 4: Behind Furniture
Tucking the monitor behind the couch or inside a bookshelf seems tidy, but stagnant air pockets give readings that lag behind the room's actual conditions. You might not see a cooking spike until 30 minutes after it happened.
Mistake 5: In the Kitchen as Your Only Monitor
A single kitchen monitor will show you dramatic highs and lows that look alarming but are normal for any home where people cook. Your overall home air quality is almost certainly better than your kitchen readings suggest.
Multi-Room Monitoring Strategy
If you want comprehensive coverage, here is the priority order for adding monitors.
Monitor 1: Bedroom. This is your highest-exposure room by time spent. Start here.
Monitor 2: Main living area. This captures your daytime air quality and catches events like cooking, cleaning, and outdoor pollution entering through doors.
Monitor 3: Home office (if you work from home) or nursery (if you have an infant). Both are high-priority because of extended exposure times.
Monitor 4: Kitchen. Valuable for understanding cooking pollution and verifying that your range hood actually works.
Monitor 5: Basement. Essential if you have radon concerns or use the basement as living space. Radon is the second leading cause of lung cancer, and basements are where levels are highest.
You do not need to buy five monitors at once. Start with your bedroom and add from there as budget allows. If you are choosing your first monitor, our roundup of the best indoor air quality monitors covers options at every price point.
Special Placement Scenarios
If You Have Pets
Pet dander settles at different heights depending on the animal. For dogs, dander concentrates below 3 feet. For cats, dander spreads more evenly because cats climb. Keep your monitor at standard breathing height (3 to 5 feet) regardless, since that is what you are breathing.
If pet dander is a primary concern, you might also consider a purifier designed for pet owners in addition to your monitor.
If You Live Near a Highway or Industrial Area
Outdoor pollution infiltrates your home unevenly. Rooms facing the pollution source will have higher readings than rooms on the opposite side. Place your monitor in the room where you spend the most time, and consider a spot-check with a portable monitor in the room closest to the pollution source.
If You Have Attached Garage
Attached garages are a significant source of carbon monoxide, benzene, and other vehicle exhaust pollutants. If your home connects to a garage, place a monitor in the room directly adjacent to the garage. Even with a sealed door, fumes migrate through gaps, shared walls, and HVAC systems.
If You Run a Humidifier
Ultrasonic humidifiers generate a fine mineral mist that many particle sensors read as PM2.5. This is a known limitation of laser-based sensors. Place the monitor at least 6 feet from any humidifier, or you will see false PM2.5 spikes every time the humidifier runs.
How to Verify Your Placement Is Good
After setting up your monitor, run a simple check over 48 hours.
Check for stability. In a room with no activity, readings should be relatively stable. If PM2.5 jumps around by more than 10 µg/m³ with no obvious source, you may be too close to a draft or vent.
Check for responsiveness. Open a window on a day with moderate outdoor pollution, or light a candle briefly. Your monitor should respond within 5 to 10 minutes. If it takes longer, the placement may have poor air circulation.
Compare spots. If you have doubts, place the monitor in your chosen spot for 24 hours, then move it to an alternative spot for another 24 hours. Compare the baselines. Choose the spot that gives consistent readings during calm periods and responsive readings during events.
Cross-reference with how you feel. If your monitor says air quality is excellent but you are waking up congested, the monitor may be too far from where you sleep or too close to the purifier's clean air output.
Bottom Line
Good data starts with good placement. Follow the three golden rules: breathing height, away from interference, and in open air. Start with your bedroom, add rooms based on where you spend time and what concerns you, and verify your placement with a 48-hour check. A well-placed $100 monitor gives you better information than a $300 monitor in the wrong spot.